DTF Powder: 7 Surprising Right About How It’s Used
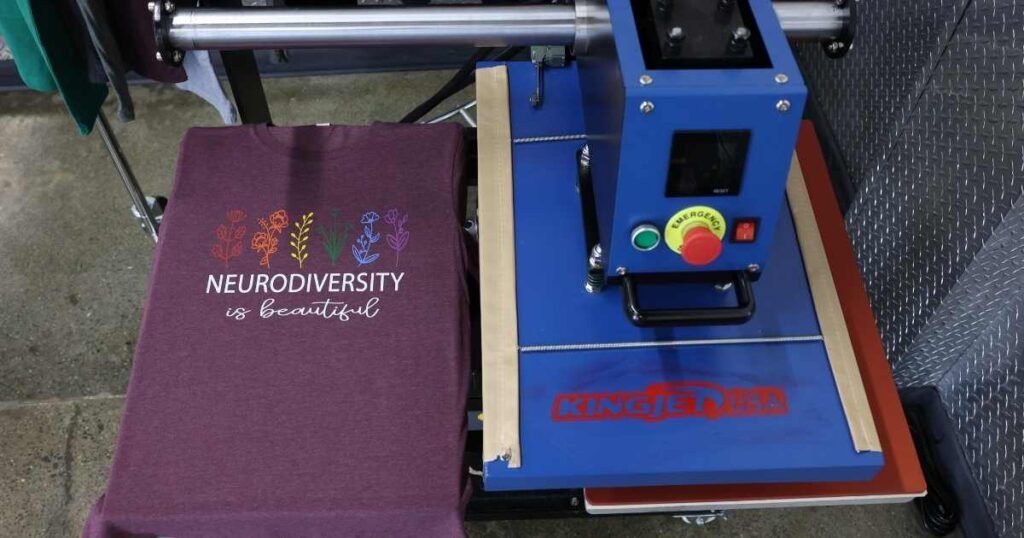
DTF powder is a thermoplastic hot-melt adhesive — almost always TPU (thermoplastic polyurethane) — applied to a printed transfer while the ink is still wet, then melted in a curing oven so it fuses into a flexible adhesive layer. That layer is what actually bonds the printed design to fabric fibers once the transfer is heat pressed; without it, DTF ink would just sit loosely on top of the film with nothing to make it stick to a shirt at all.
This guide covers everything about DTF powder specifically: what it’s chemically made of, exactly how and when it gets applied in the production sequence, the mesh/particle-size differences that change how a finished print feels and holds up, the most common application problems (and their real root causes), and the storage and handling details almost no other guide covers in depth. For the ink side of the process, see What Ink Is Used for DTF Printing? and What Is DTF White Ink?. For where DTF powder fits into the full sequence, see How Are DTF Transfers Made?.
What Is DTF Powder Made Of?
DTF powder is a thermoplastic hot-melt adhesive, and the overwhelming majority of it on the market today is TPU — thermoplastic polyurethane. TPU is the reason a finished DTF transfer feels soft and stretchy on a garment rather than stiff and plasticky the way older heat-transfer materials often did. It has genuine elasticity: it can stretch with the fabric during wear and washing and recover its shape afterward without cracking, which matters enormously for anything printed on stretch fabrics like athletic wear.
TPU also bonds well across a wide range of fiber types — natural fibers like cotton and linen as well as synthetic fibers like polyester and nylon — which is part of why DTF works across so many fabric types without switching adhesive chemistry the way some other printing methods require. Some older or budget powders use PA (polyamide) hot-melt adhesive instead of TPU; PA bonds well to cotton specifically but performs noticeably worse on synthetic and blended fabrics, which is one real, practical reason TPU has become the dominant standard rather than just a marketing preference.
How DTF Powder Is Actually Used, Step by Step
Powder application happens at one specific, narrow window in the production sequence, and the timing matters as much as the technique:
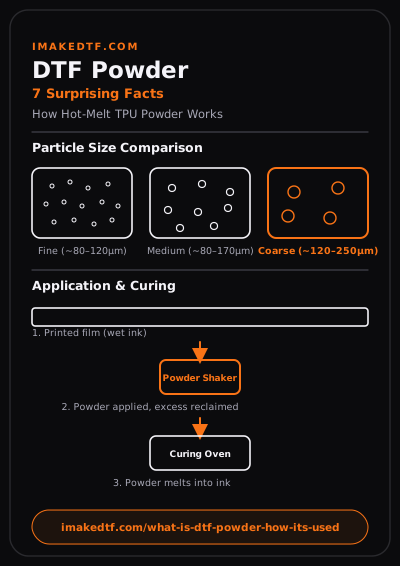
1. The design prints onto PET film with the ink still wet. DTF Powder has to go on before the ink dries, because it needs the wet ink’s tackiness to hold the granules in place on the printed areas.
2. Powder is applied over the entire printed surface. This can be done by hand-shaking from a container, but at any real production volume it’s done with a dedicated powder shaker machine that distributes the adhesive evenly across the film.
3. Excess powder is shaken or vibrated off. Wet ink holds the DTF powder; unprinted film area doesn’t. Shaking removes everything that didn’t stick, leaving powder only where the design was actually printed. Reclaimed excess DTF powder is typically funneled back into the shaker’s supply for reuse, which matters for waste economics at scale.
4. The film is cured. A curing oven, heat tunnel, or heat gun at a controlled distance melts the DTF powder granules into a continuous adhesive layer fused to the ink — enough to bond the layer permanently, but not so much that it fully activates before it reaches a garment.
5. The cured film is stored until it’s pressed. This is the same decoupling that makes DTF transfers shippable and shelf-stable — a properly cured, powdered transfer can sit for weeks or months before it’s ever pressed onto fabric.
Powder coverage needs to be even across an entire sheet, and tightly packed designs make that easier to control and inspect than scattered ones. Our Gang Sheet Builder auto-arranges multiple designs to minimize wasted film and keep your printed area easier to powder evenly.
DTF Powder Particle Size: Fine, Medium, and Coarse
Powder isn’t sold as one uniform product — particle size is measured in microns (and sometimes described by mesh number, an older sieve-based sizing standard), and the size you choose changes both how a finished transfer feels and how durable it is. This is the single most consequential buying decision in the whole DTF powder category, and it’s worth understanding the actual numbers rather than just “fine vs. coarse” as vague labels:
| Powder Type | Approx. Particle Size | Feel | Best For |
|---|---|---|---|
| Ultra-fine | Under 80 microns | Softest, least noticeable on skin | High-detail graphics, premium soft-hand apparel |
| Fine | 80–120 microns | Soft, minimal texture | Lightweight fabrics, small text, intricate designs |
| Medium | 80–170 microns | Balanced | General-purpose, most everyday orders |
| Coarse | 120–250 microns | Firmer, more textured | Denim, canvas, workwear, high-abrasion use |
The underlying physics is straightforward: smaller particles melt into a thinner, more uniform adhesive layer that flexes more freely with fabric movement, which is why fine powder feels softer. Larger particles create a thicker adhesive layer with more raised texture, but that thickness also means more total adhesive material bonding the design to the fabric — which is exactly why coarse powder tends to outlast fine powder under repeated washing and abrasion, especially on rougher fabrics like denim or canvas that see more mechanical stress.
This is a genuine trade-off, not a “better vs. worse” choice — a soft-hand baby onesie and a heavy-duty workwear jacket have opposite priorities, and the correct powder choice for one would be the wrong choice for the other. Most everyday commercial print orders land safely in the medium range specifically because it doesn’t force you to pick an extreme in either direction.
Powder Shaker Machines vs. Hand Shaking
At low volume, hand-shaking powder from a container directly onto a freshly printed film works, but it has a well-documented failure mode: uneven coverage, with too much DTF powder pooling in one area and almost none reaching another. That unevenness doesn’t show up until the transfer is pressed — an area with too little powder will have weak, patchy adhesion, and an area with too much can actually obscure fine design detail once melted.
A dedicated powder shaker machine solves this by distributing powder across the entire film width mechanically, at a consistent rate, and reclaiming the unused excess for reuse rather than wasting it. But machines introduce their own calibration variables that hand-shaking doesn’t: shaking intensity and conveyor speed both need to be tuned to the specific powder’s particle size and the ink coverage on that particular print run. Too aggressive a shake speed on fine powder can actually knock loose powder off areas with lighter ink coverage before it’s had a chance to adhere; too slow a pass on a heavily inked design can leave the powder tray overloaded and clumping rather than distributing evenly.
The Humidity and Static Problem Almost No Guide Explains Clearly
Here’s a detail that matters far more in practice than most powder guides acknowledge: workshop humidity directly affects how well powder behaves during application, and it’s not just about the ink or the film — it’s about static electricity in the powder itself. In dry conditions (typically below 40% relative humidity), fine hot-melt powder particles pick up a static charge easily, which causes them to cling weakly to areas outside the actual printed design — a fine, hazy dusting across the whole sheet rather than clean, precise coverage limited to the ink.
That stray powder either has to be more aggressively shaken off (risking removing powder from the design itself) or it survives curing as a faint, unwanted textured haze across the “blank” parts of the transfer.
Keeping shop humidity in the 40–60% relative humidity range — the same range recommended for ink storage, conveniently — measurably reduces this static cling effect and gives a cleaner separation between powdered design areas and bare film. This single environmental control point solves a problem that a lot of operators mistakenly troubleshoot by changing powder brands or shaker settings first, when the actual fix was in the room, not the equipment.
Common DTF Powder Problems and Their Real Causes
Peeling after only a few washes is frequently a powder coverage problem, not a heat press problem — insufficient powder in an area means insufficient adhesive bonding that fabric to ink, and no amount of correct pressing time or temperature (covered fully in our heat press settings guide) can compensate for adhesive that was never applied there in the first place.
A grainy, rough texture across large solid-color areas usually means the powder mesh size is too coarse for that specific design — fine detail and large flat color fields both show coarse powder’s texture more visibly than smaller design elements do, which is why fine or ultra-fine powder is the standard recommendation for detailed or photo-realistic prints.
Uneven, patchy adhesion in specific spots on an otherwise good transfer points to inconsistent powder distribution from the shaker, not a curing or pressing issue — check the shaker’s intensity and speed calibration against the specific powder and ink coverage of that print run before adjusting anything downstream.
A visible dusty haze on the finished transfer outside the design is a static/humidity issue, as covered above — check shop relative humidity before assuming it’s a powder quality defect.
Powder that won’t melt fully during curing, leaving a slightly gritty texture even on properly powdered areas usually means the curing oven temperature or dwell time is too low for that specific powder — different TPU formulations have different melt points, and a curing setting that worked fine for one powder brand isn’t guaranteed to fully melt another without adjustment.
The right powder mesh size interacts directly with fabric type — coarse powder on a delicate fabric or fine powder on heavy-abrasion workwear both create predictable problems. Our Fabric Compatibility Checker flags what to expect across 14 common fabric types before you press.
A Simple Quality Check Most Shops Skip
One practical technique worth adopting that rarely appears in competitor guides: after curing but before pressing, gently rub a thumb across a cured (unpressed) transfer’s powdered surface. A properly cured, adequately powdered area should feel like a smooth, slightly plastic-like continuous film — not gritty, not powdery, and not tacky.
A gritty feel means either under-application or incomplete curing; a tacky feel usually means the curing temperature undershot the powder’s melt point. Catching this before pressing — rather than discovering peeling after a customer has already worn and washed the shirt — is one of the cheapest quality-control habits in the entire DTF workflow, and it costs nothing but a few seconds per sheet.
Powder Storage and Handling
Like DTF ink, hot-melt TPU powder has real storage sensitivities that affect performance. It should be kept in a sealed, dry container away from humidity — powder that absorbs ambient moisture before use can clump, apply unevenly, and in some cases fail to melt as cleanly during curing.
Keeping it in the same 40–60% relative humidity range recommended for the workshop overall (and definitely not stored somewhere damp, like near a water source or in an uninsulated space with condensation risk) preserves both flow behavior during application and melt consistency during curing.
Reclaimed excess powder — the material a shaker collects after shaking off everything that didn’t stick to wet ink — is reusable, but it’s worth screening it periodically for contamination from dust, lint, or film debris that can accumulate in a reclaim system over time and reduce coverage quality on later prints.
Powder Coverage and Your Cost Per Transfer
Powder is a genuinely minor line-item cost compared to ink or film on a per-transfer basis, but at real production volume the reclaim rate of a shaker system meaningfully affects total consumable cost — a shaker that reclaims and reuses excess powder efficiently wastes far less material over thousands of prints than hand-shaking, where unused powder is difficult to collect and reuse cleanly. If you’re pricing your own transfers or comparing suppliers, this is a legitimate (if small) factor in overall unit economics.
Ink, film, and powder all factor into your true cost per transfer — and small consumable costs add up at volume. Our DTF Price Calculator combines your actual input costs with platform fees to show your real minimum price and profit per unit.
Frequently Asked Questions
Is DTF powder the same as heat transfer vinyl adhesive?
No. HTV uses a pre-applied heat-activated adhesive backing on a solid cut vinyl piece, while DTF powder is a granular hot-melt adhesive applied to a printed film and melted during curing — it’s a completely different material and application method, even though both ultimately bond a design to fabric with heat.
Can I mix different DTF powder brands or mesh sizes?
It’s not recommended within a single print run. Different powders can have different melt points and particle behavior, and mixing them makes curing temperature and shake calibration unpredictable — pick one powder per batch and adjust curing settings specifically for it.
Does DTF powder expire?
Yes, though it lasts longer than ink when stored correctly — dry, sealed, and away from humidity. Powder that’s absorbed moisture over time can clump and apply unevenly even if it hasn’t technically “expired,” so proper storage matters more than a hard expiration date.
Why does my transfer feel stiff even though I used fine powder?
Stiffness is more often a sign of over-application (too much powder in that area) than particle size alone — even fine powder feels stiff and plasticky if it’s applied too thickly, since the total adhesive layer thickness is what drives hand-feel as much as the individual particle size does.
What mesh size should a beginner start with?
Medium powder (roughly 80–170 microns) is the safest starting point for most general apparel work — it balances softness and durability reasonably well and doesn’t require choosing between the two extremes while you’re still calibrating your curing and pressing settings.
Sources: Pantheraprints.com